Quick Facts
- Architectural Era: Mid-to-late 18th Century (1760s).
- Primary Challenge: Moisture management in breathable stone or timber-frame walls.
- Key Material Rule: Always use lime mortar for masonry; avoid Portland cement to prevent stone spalling.
- Efficiency Priority: Seal the "attic floor" and "cellar door" before attempting to insulate exterior walls.
- The Golden Ratio: Maintain indoor relative humidity below 50% during winter to prevent structural decay.
When you step across the threshold of a 1760s cottage, you aren’t just a homeowner; you are a steward of a living artifact. Whether it is a Cape Cod nestled in New England or a Captain’s Cottage on the coast, these homes were built with a philosophy of breathability that is fundamentally at odds with modern construction. To renovate one of these structures successfully, you have to play a delicate game of "Modern Heritage." You want the comfort of a 21st-century HVAC system and the sleekness of a professional range, but if you wrap a 250-year-old stone house in a plastic "bag" of modern insulation, the house will literally begin to consume itself from the inside out.
Blending history with modern function requires a "reversibility" mindset. Every upgrade you make should ideally be something a future owner could undo without destroying the original fabric of the home. This guide will walk you through the structural science of 18th-century moisture management, the aesthetics of the heritage kitchen, and the technical hurdles of bringing a historic envelope up to modern efficiency standards.
The Philosophy of 'Modern Heritage'
Blending history with modern function is an exercise in restraint. To achieve this balance, you must preserve original structural elements like rough-hewn beams, hand-planed paneling, and wide-plank floors while integrating high-performance appliances and period-appropriate hardware. The goal isn't to create a museum where you’re afraid to touch the walls, but to create a space where a 1760s fireplace can coexist with a hidden charging station.
When approaching a room, identify the "Hero Elements"—the parts of the room that scream 18th century. Perhaps it’s the original "King’s Wood" floorboards or a massive hearth. Once these are identified, your modern interventions should be as quiet as possible. For example, instead of installing bulky modern cabinets that hide the original plaster, consider "unfitted" cabinetry—individual pieces of furniture that look like they’ve evolved with the house over centuries. This keeps the room feeling open and allows the historic architecture to breathe, both visually and physically.
Managing the Invisible: Moisture and Breathability
The most significant danger to an 18th-century home isn't fire or wind; it’s moisture trapped by modern "improvements." 1760s stone houses were typically built using traditional mud-based bedding mortar or soft lime. These materials are highly vapor-permeable, meaning they allow moisture to move through the wall and evaporate.
If you apply modern fiberglass batts or closed-cell spray foam directly against these walls, you create a "dew point" inside the wall assembly. Because 18th-century homes utilizing traditional mud-based bedding mortar require a vapor permeability rate approximately 40% higher than modern portland cement structures to ensure structural longevity, trapping that vapor leads to "interstitial condensation." This results in rotted sills, crumbling mortar, and eventually, structural failure.
To manage this, you must become a data-driven renovator. Maintaining indoor relative humidity below 50% during winter is the critical threshold for preventing this condensation. I always recommend that homeowners invest in a handheld IR camera, like a Seek or FLIR attachment for your phone. In the dead of winter, walk your perimeter. You’ll see exactly where the heat is escaping, but more importantly, you’ll see where the "cold spots" are that might be collecting moisture. Instead of a blanket approach to insulation, use this data to find "low-hanging fruit" like air leaks around window weights or gaps in the floor joists.
Insulating Without Damage
In the world of historic renovation, the "Law of Diminishing Returns" hits hard. While it’s tempting to want R-40 walls, the cost to the building’s health is often too high. Instead, focus on the "top and bottom" of the house.
The attic floor and the rim joists in the cellar are your high-impact areas. Insulating the attic floor with dense-packed cellulose is a fantastic DIY-friendly project that provides a massive boost in efficiency without affecting the breathability of the exterior walls. Cellulose is hygroscopic, meaning it can manage small amounts of moisture without losing its R-value, unlike fiberglass.
For the cellar, avoid spray-foaming the entire stone foundation. This can trap water behind the foam, which eventually freezes and cracks the stones. Instead, focus on the "rim joists"—the area where the wooden house meets the stone foundation. Sealing this gap with small amounts of rigid foam and fire-rated caulk can stop the "stack effect" that pulls cold air up through your floorboards.
Pro Tip: If you must insulate exterior walls, look into "breathable" systems like wood fiber board or hempcrete. These materials mimic the vapor-open nature of 18th-century materials while providing a thermal break.
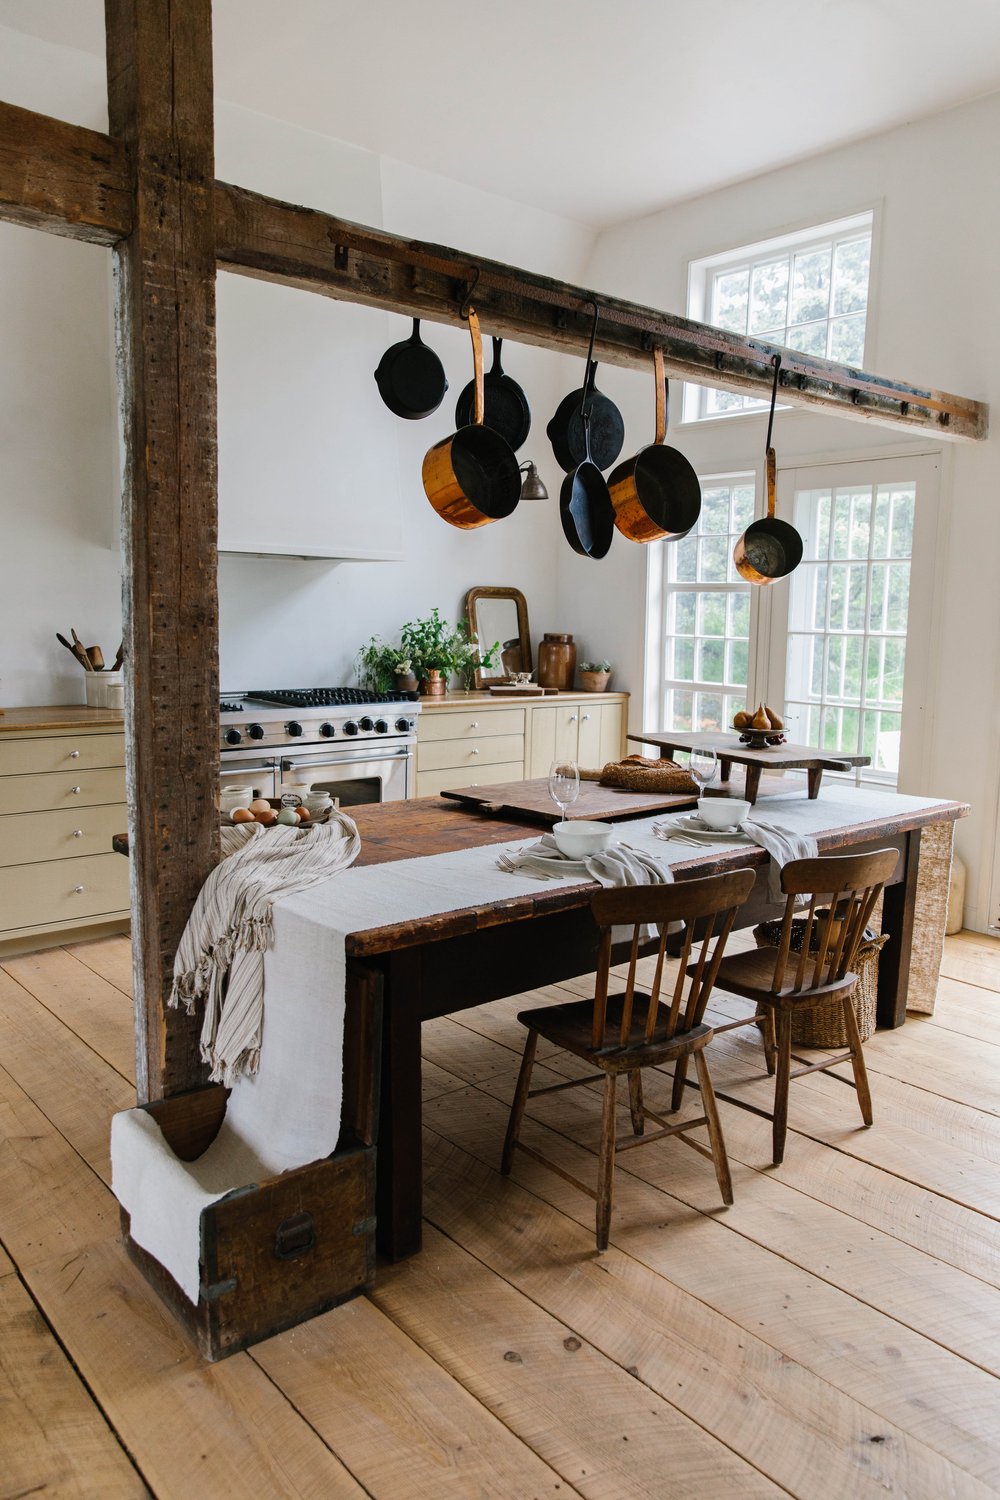
Steal the Look: The Heritage Kitchen
The kitchen is where the 1760s and the 2020s most frequently collide. To bridge the gap, I recommend starting with an "Anchor Piece." Instead of a built-in kitchen island with a granite waterfall edge—which can feel jarringly modern—opt for an antique bakery table or a heavy trestle table. These pieces provide a functional workspace while maintaining the furniture-like feel of an 18th-century "keeping room."

When it comes to appliances, "panel-ready" is your best friend. Hiding a high-tech dishwasher or refrigerator behind a wood panel that matches your cabinetry preserves the visual timeline. For the range, look for "pro-style" models that have a timeless, industrial feel, or consider refurbished vintage models if you’re brave enough to handle the maintenance.
Hardware and Finishes
The details are where a renovation feels authentic or like a cheap imitation. Avoid high-gloss chrome or modern brushed gold. Instead, look for:
- Living Finishes: Unlacquered brass or copper that will patina over time.
- Ironmongery: Hand-forged iron hooks and "thumb latches" for doors.
- Paint Palette: Use earthy, historical tones. Sherwin Williams Bosc Pear or Farrow & Ball’s Old White offer the depth needed to complement old-growth timber.
Modern Systems in Historic Envelopes
The biggest headache in an 18th-century cottage is where to put the "guts"—the HVAC, plumbing, and electrical.
HVAC Strategies Standard 12-inch ductwork is the enemy of low 1760s ceilings. Instead, look into high-velocity mini-duct systems (like Unico). These use flexible 2-inch tubes that can be snaked through floor joists and behind walls without requiring massive soffits that ruin the room's proportions. Alternatively, ductless mini-splits are efficient, though their wall-mounted units can be an eyesore. Many homeowners now opt for floor-mounted mini-split units that can be tucked into unused "knee walls" or decorative cabinets.
The Lime Mortar Rule If your renovation involves repointing the exterior stone or brick, you must follow the Lime Mortar Rule. Modern Portland cement is harder than 18th-century stone or brick. When the house naturally shifts or the temperature changes, the soft stone will break before the hard cement does—a process called "spalling." Always use a NHL (Natural Hydraulic Lime) mortar, which is softer and allows the building to move and breathe.
| Feature | 1760s Traditional | Modern Standard (Avoid) |
|---|---|---|
| Mortar | Lime or Mud-based | Portland Cement |
| Insulation | Cellulose or Wood Fiber | Closed-cell Spray Foam |
| Windows | Wood with Storms | Vinyl Inserts |
| Wiring | Modern Romex (Hidden) | Exposed Conduit |
Navigating the Bureaucracy: HPRB and Permits
If your cottage is in a historic district, you will likely deal with a Historic Preservation Review Board (HPRB). The trick to a smooth permit process is understanding the difference between "Administrative" and "Board" reviews. Minor repairs (like repainting or replacing a roof with like-materials) are often approved administratively in days. Major changes (like window replacements or additions) require a full board hearing.
A major update for 2024 is the shift toward sustainability. The Resilient and Energy Efficient Historic Properties Amendment Act has made it much easier to install solar panels on historic roofs, provided they are not visible from the primary street-facing elevation. Always check your local bylaws before buying that "modern heritage" solar array.
FAQ
Can I use vinyl windows in a 1760s cottage? I strongly advise against it. Not only do they look out of place, but their lifespan is significantly shorter than a well-maintained wood window. A better approach is to restore the original wood sashes and add high-quality interior or exterior "low-e" storm windows. This setup can achieve thermal performance nearly equal to a modern double-pane window while preserving the historic character.
Is spray foam safe for my stone basement? Generally, no. Closed-cell spray foam creates an impermeable barrier. In a 1760s stone foundation, moisture needs to be able to migrate through the wall. If you seal it, you risk "freeze-thaw" damage where the water inside the stone expands and shatters the masonry. Use a "french drain" and dehumidification to manage basement moisture instead.
How do I stop ice dams without gutting the roof? Ice dams in old houses are caused by heat escaping the living space and melting snow on the roof. The solution isn't on the roof—it's in the attic floor. By air-sealing every gap where wires or pipes go into the attic and adding a thick layer of cellulose insulation, you keep the roof cold, which prevents the melt-and-freeze cycle.
Conclusion
Renovating a 1760s cottage is a marathon, not a sprint. It requires you to listen to the house—to understand how it breathes, how it moves, and how it has survived for over two centuries. By prioritizing moisture management, respecting the "breathability" of traditional materials, and choosing "unfitted" design elements, you can create a home that feels both ancient and effortless.
Ready to start your journey as a historic steward? Begin by measuring your indoor humidity today. If it’s over 50%, your first project isn’t the kitchen—it’s the ventilation. Happy renovating!